Integrates PayPal payments into Participants Database with a full set of features for managing dues payments, pay-to-join and lots more.
Important Note
This plugin relies on the use of the PayPal “Buy Now” buttons, which is getting phased out by PayPal.
Your payment buttons will continue to work, they are not stopping it working. However, it will eventually be impossible to create new Buy Now buttons, and so I have stopped selling the plugin to new customers.
Product Setup
- Before you start taking payments
- Setting up payment buttons
- Setting up the data link with PayPal
- Setting up your payment forms
- Configuring the payment log
- Configuring your dues or subscription payment schedule
- Setting up the “Last Payment Values” fields
- Manual log entries
- Email and Message Value tags
- Email Communications
- Exporting/Importing Payment Logs
Important Note
This plugin is complex and it involves a lot of configuration to get it doing what you need. It is very important to completely test the plugin’s functionality before you start taking payments. I suggest you use the PayPal Sandbox for your testing, it lets you make as many test purchases as you want so you can be certain it’s working as expected. I’ve included a special set of settings just for testing to help you avoid unpleasant surprises after you go live.
I do offer support for configuring the plugin, but I cannot guarantee a timely response. Don’t put yourself in the position of having to make an emergency support request. If you’ve tested the functionality before going live with it, you can be sure that things will go smoothly once you’ve started accepting payments.
How It Works
The plugin works by placing a PayPal payment button in a Participants Database form. When the user clicks on the PayPal payment button, the contents of the form is processed into Participants Database and the user is sent to PayPal to make the payment. When they complete their transaction, a record is made of the payment via PayPal Payment Data Transfer and/or Instant Payment Notification.
To keep a log of member payments, this plugin requires the PayPal account be configured to send Instant Payment Notifications and/or process a Payment Data Transfer.
Configuring the Member Payments Add-On is a bit complex, but these instructions will help you get it all working. These are the main parts, we’ll explain each one in turn.
- Set up the PayPal payment button
- Set up to receive PayPal payment data
- Set up your payment forms
- Set up payment logging
Configuring PayPal
Everything in this section requires that you be logged in to your PayPal account.
The first thing you will need to set up is the payment button. You may be familiar with this in PayPal, it is a little snippet of HTML that when displayed on a web page, is a clickable way to make a payment at PayPal. If you are already using an instant payment button, you can use the same code in the Member Payments add-on.
Set Up Your PayPal Button
Log in to PayPal, and go to your Profile page. Click on My Selling Tools, and find PayPal Buttons near the top of the list of items on the right. Click on “update” to the right of “Manage my payment buttons.” That will take you to a list of default and custom buttons. If you already have a button set up, use that one. Otherwise, follow PayPal’s instructions for setting up a payment button.
There will be several button options offered, choose “Buy Now” This is the only button type that is currently supported by Member Payments.
Once you have your button code (you must copy it from the PayPal site) insert that code into the “PayPal Button HTML” setting in the Member Payments setup under the General tab. Now, all your Member Payments shortcodes will include that button in the form.
(Setting this up for PayPal Sandbox is exactly the same, with the important difference being you’ll be logged in to www.sandbox.paypal.com with your sandbox account.)
It’s also possible to use a different button code for each shortcode by including the button code in the “button_html” attribute of the signup, record or member payment shortcodes. More on that in the Product FAQ.
If you use “hosted” buttons (which are a bit more secure), you won’t be able to control the return page from the plugin side. The return page when using a hosted button is set up in the button configuration. If you have more than one payment portal, and want to give each one a different return page, you will need to define a separate hosted button for each one.
“Subscribe” buttons are not supported, the plugin can’t provide a way for the user to manage their subscription.
Logging Payments
There are two ways that PayPal sends transaction information to your website so that the user’s payments can be logged: Instant Payment Notifications (IPN) or Payment Data Transfer (PDT). You can use either or both, but it is recommended you use both so that you have a backup method in case one fails. Using both methods will not result in duplicates in the log, each transaction will only be logged once.
IPN and PDT both supply the same kind of information, but in two different ways:
- IPN is asynchronous, meaning that is it sent in the background independently of the user’s actions, usually within a few seconds. That means that IPN doesn’t rely on the user going back to the site after authorizing the purchase. Their transaction will be logged anyway. In most cases, this method serves as a backup in case something happens and the user doesn’t make it back to the “thanks” page.
- PDT requires the user to return to the “Return URL” so the payment data can be given to the website. The advantage here is that the information is available immediately. If you want your users to return to your site to be thanked and have their payment acknowledged, you must use this method.
More info on the difference between the methods from PayPal: IPN vs. PDT
Setting Up Instant Payment Notifications
- Under your name (top right corner of the page) find “Account Settings” then “Website Payments”
- find “Instant payment notifications” and click on “update”
- click on “Edit Settings”
- enter your IPN Notification URL: it is the home URL of your WordPress site
- select “Receive IPN messages”
- save, and you’re done.
Setting up Payment Data Transfer
- Under your name (top right corner of the page) find “Account Settings” then “Website Payments”
- find “Website preferences” click on “update”
- Auto Return: select “On”
- for the “Return URL,” put the URL for your “thanks” page (the one with the [[pdb_member_payment_thanks]] shortcode)
- find Payment Data Transfer, select “On”
- just below this, you’ll see the “Identity Token” select and copy this token
- go to the bottom of the page and click on “save”
- back on your WordPress site, in the Member Payments settings, general tab, paste in the token
With these configurations, logging of PayPal transactions can begin.
Payment Forms
There are two different ways to implement the Participants Database payment button. You can use one or both of them. You’ll need to decide which is right for your situation.
Once you have chosen the method or methods you want to use, you must either change your existing Participants Database forms shortcodes or place new shortcodes. You will need to place new shortcodes if this is a new installation or you want to use the “Member Payment” form.
The shortcodes provided by this plugin use all the same attributes of the regular Participants Database form shortcodes. The [pdb_signup_member_payment] shortcode shows a signup form with a PayPal payment button so that a new record is created when the form is submitted. The [pdb_member_payment] shortcode gives members an easy way to make a payment on their account.
If you are using custom templates, you must alter those templates to include the payment button. By inspecting the templates provided by this add-on and comparing to your custom template it’s easy to add the code needed to show the payment button.
Setting Up the “Thanks” Page
Each of the payment forms can be configured to take the user to a “thanks” page after the payment is made.
The way this works by default is a little different for each one. In all cases, after the user makes a PayPal payment, the user is returned to the “Return URL” as configured at PayPal. They will also be returned to this page if they cancel the transaction, and the plugin will show the “Cancel Return Message.”
For the Signup Payment form, when an offline payment is made, the thanks page will be the “Signup Thanks Page” as configured in the main Participants Database settings.
All of these behaviors can be modified in the shortcode. For the Signup Payment, the page the user is returned to after making an offline payment can be determined by the “action” attribute in the shortcode, for instance: [pdb_signup_member_payment action="offline-payment-thanks"] will send the user to a page named offline-payment-thanks after selecting an offline payment and submitting the form.
(Please note: for any thanks page that is designed to work with the Signup Payment form, you must use the [pdb_signup_member_payment_thanks] shortcode.)
For PayPal payments, the “return_url” and “cancel_return” attributes can be used to set what happens when making a PayPal payment…for example:
[pdb_signup_member_payment return_url="member-payment-thanks"]
This will return the user to the page named “member-payment-thanks” after making their PayPal payment, overriding the “Return URL” setting. When setting up a thanks page for the Member Payment form you must use the [pdb_member_payment_thanks] shortcode on that page.
All of the payment forms will work as their own thanks page: if the user goes back to the form page after making a payment or submitting the form, it will show the appropriate thanks message.
Configuring the Payment Log
The user’s payment is logged to a special field in Participants Database that is automatically set up by the Member Payments plugin. The new field will appear in an admin field group (if you have one, in the first field group if you don’t). After activating the plugin, go to the “Manage Database Fields” page in the admin, click on the tab for an admin field group (the default is “Administrative Info”), and look for a field named “Payment Log” That is your log field and you can change it’s configuration there, including changing it’s title or moving it to another group if you like.
Configuring the Log Fields
When a user makes a payment, PayPal sends a packet of data back to the site. There are lots of pieces of information in that packet, but only a few of them will need to be logged. The plugin pre-configures the log fields, and for most installs, that will be all you need. If you need, you can change which data fields you are logging in the log field configuration: Advanced Log Field Configuration
Configuring a Dues or Payment Schedule
For many situations, you will want members to make payments on a regular basis, such as for a dues payment. The plugin can tell you what each member’s payment status is, but in order to do that, you have to configure your payment schedule.
There are two kinds of payment schedule: fixed date and period. A fixed date schedule is for dues that are always due on a specific date or dates of the year. For instance a biennial schedule could be: January 1st and July 1st. The user’s payment becomes due on those dates. The period schedule is more like a subscription payment: the payment is for a set period of time, beginning the date the payment was made. The next payment will be due when that period is over.
See the “Settings” tab for details on configuring the payment schedule.
Member Payment Status
Each member has a payment status based on the payment schedule and when the last payment was made. Those statuses are:
- paid (the member is current with payments)
- payable (it is time to make a payment)
- due (the payment due date is past)
- past due (the member is late on their payment)
The “payable” and “past due” dates are configurable relative to the due date. For instance, you can set it up so that the payment becomes past due 7 days after the due date.
When the member’s payment status changes, an event for that change is triggered. When the Email Expansion Kit is installed, it is possible to set up an email that will be automatically sent on the status change. For instance, you can set up an email to go out when the member’s payment is due, and a different one that goes out when the member’s payment is past due.
Setting Up the Last Value Fields
In most cases, it’s the values in the last log entry that carry the most relevant values. You can create what are called “last value fields” that hold the last value of any of the log fields. One useful application of these fields is for showing information to the user: while the log itself is usually only visible to administrators, it may be useful for the regular user to know when the last payment was, for instance.
Last Value Fields are set up by creating a new field with the same name as the log field you want it to mirror. For instance, there is a log field named “payment_date” which holds the date of the payment. By creating a date field named “payment_date” you will set up a field that will always contain the date of the last payment in the log.
To set up a field that shows the last amount paid, you can create a field named “mc_gross” (this is the name of the payment amount field PayPal uses) and it will be filled in with the last amount paid, including manual payments. Once you have created the field, you can change the title of the field to anything you want.
Last Value Fields can use other field types, as well. For instance, with the “payment status” field there is a limited set of possible values (as defined in the IPN/PDT variables), which means it would work well as a dropdown field.
Note that the last value field must appear in the payment log for the value to be transferred to the last value field. This means that the field must be listed in the “options” of the Payment Log field.
If you are planning to offer options for your payments (such as different price options) you can track the user’s selection using a last value field. The instructions for configuring that are in this article: Setting up payment options in Member Payments.
Manual Log Entries
If the “Payment Log Edit Lock” setting is unchecked, it becomes possible to add a new entry to the edit log. When the new entry is added, it is placed in the log according to the payment date.
The manual log entry uses text fields to enter values unless a last value field has been defined for that log field. In that case, the last value field definition is used to define the input control used for the new log entry.
For instance, if you set up a dropdown field (as suggested above) for the “payment_status” log field, when adding a new log entry, the payment status field will be set using a dropdown control.
Value Tags
User feedback and emails use a templating system like the one in Participants Database that allows you to use “value tags” in your messaging. These value tags will include all the fields defined in Participants Database, all the data fields in the PayPal transaction, and several payment status fields if you are using the Payment Status module of the add-on. A value tag is simple the name of the field whose value you want to show in brackets like this [txn_id].
A list of useful tags is as follows.
- [txn_id] – the transaction ID from the PayPal purchase
- [txn_amount] – the transaction amount
- [payment_status] – the current payment status of the account… like “paid,” “past due,” etc.
- [last_payment_date] – the date of the last payment
- [next_due_date] – the date the next payment will be due
- [option_selection1] – if your payment button has options, the selected option will be in a field like this (the name may vary, look at your payment button code for the name you need to use)
Advanced Setup
Here are some instructions for getting deeper into the configuration of this plugin. Instructions in this section are optional, you don’t need to do anything here, they are additional capabilities you can access if you need.
Email Communications
This add-on works with the built-in email functionality of Participants Database: when the signup payment form is used, the person signing up gets the usual receipt email, and the administrator gets their notification (if configured to do so). The same is true of the “Profile Payment” form: as in Participants Database, there is no user email for updating their profile, but there is an administrator notification for that.
The built-in emails can all use the “value tags” from this add-on as described above.
Advanced Email Configuration
With the addition of the Email Expansion Kit, many more possibilities become available for email communications. Custom emails can be triggered on a number of events generated by this add-on:
- Signup Payment Return
- Member Payment Return
- Profile Payment Return
- Cancel Payment Return
- PayPal IPN Recieved
Status Change Emails
When using the Payment Status module, events are generated when the member’s payment status changes. For instance, when a member’s uses payment becomes due. These status change events are triggered automatically in the background according to the date, and also when the payment log is updated with a new payment. There are four status change events that you can use:
- Status Change to Paid
- Status Change to Payable
- Status Change to Payment Due
- Status Change to Past Due
Advanced Payment Log Field Configuration
The payment log is pre-configured to include the most important fields of information. There is more information available, however, and this is how you can change which fields are logged.
Looking at the “Payment Log” field, in the “values” area, you’ll see the log columns defined as a comma-separated list of name::title definitions. For instance, the first one is payment_date::Date that means that the name of the data field is “payment_date” and the title of the field (or column) is “Date” You can change the title to anything you want at any time. Be careful about changing the name of the data field because that corresponds to a data filed in the packet the site receives from PayPal.
A full list of the data fields can be found here: IPN and PDT variables Much of that is pretty technical, and it may take a little research to understand what info you need to log. The default columns that are pre-set by the plugin will give you most of the important stuff, so you can just leave the default setting for the log fields in most cases.
Exporting and Importing Payment Logs
As of version 2.7, Member Payments has the ability to export and import payment logs with the record. If the “pdbmps_payment_log” field is configured to be included in the CSV, when records are exported (on the Participants Database admin List Participants page), the value for the Payment Log field will be a human-readable block of text with all the record’s payment logs.
This string has a very specific format so that it will work with most data sets and fit within the CSV file format. In the log value, each log entry is separated from the others with a “pipe” | character. Within each entry, each field of data is separated from the others with a double semicolon ;;. And then each data field is devided between the field’s name and its value with an “equals arrow” character =>.
If you follow this specific format when importing the record, you can add new payment entries with a CSV import. This include adding a payment to new records. To update or change an existing log entry, you must include the entry_id field. Be careful with this, you can end up with garbled data if it is done wrong. If you don’t want to change anything in the payment log it is best to remove the payment_log field from the CSV before you import it.
Product Settings
PayPal Settings Tab
Payment Button Label
Optional text label for the payment button in the form.
PayPal Identity Token
This is an identifying code used by PayPal to authenticate a Payment Data Transfer communication with the web server. Not needed if you don’t use PDT.
PayPal Button HTML
Usually, this is obtained from PayPal from the defined payment buttons for your PayPal account. This HTML can be modified (if you know what you’re doing) to add selections and other variations, or to change the appearance.
Member Payment Settings Tab
These settings only pertain to the [pdb_member_payment] shortcode, you don’t need them if you are not using this payment method.
Payment Form Match Fields
These are the fields that are used to identify the user. This could be something like a “username/password” combination, or something as simple as a member ID or even an email address.
This form does not give access to sensitive information, but the field or fields must identify a single record only, so that the payment can be credited to a single record in the database.
Record Not Found Message
Message shown if the entered data does not match any record in the database.
Payment Thanks Message
Message shown on the screen after a payment is made. This is only seen if the user returns to the site after completing the payment at PayPal. Value tags are available in this template.
Cancel Return Message
If the user uses the “cancel return” button on the PayPal payment page and returns to the site without completing a payment, this message is shown on the screen.
Signup Payment Settings Tab
Approve on Payment
When checked, a new signup will have the “approved” field marked “yes” when payment is received.
Signup Payment Thanks Message
This message is displayed on the screen when the user returns after making a payment.
Cancel Return Message
This message is displayed on the screen if the user submits the form without making a payment, or if they cancel out of the off-site payment.
Enable Offline Payments
If checked, the user will have the choice to pay using an offline method, such as a mailed check or an in-person payment.
Payment Type Selector Label
This labels the radio button selector used to choose the payment method.
Offline Payment Label
This is used to label the offline method in the payment method selector.
Offline Submit Button Text
This the text on the submit button when using an offline payment method.
Offline Payment Method Help Message
This is shown next to the offline payment selection in the payment method selector.
Offline Payment Thanks Message
Shown after the user submits the signup form while using the offline payment method.
Payment Status Settings Tab
Enable Member Payment Status
Check this to keep track of your members current payment status.
Payment Due Mode
Theses correspond to two ways of structuring your member payments: either as a set schedule (Fixed Dates) with payments due on certain dates of the year, or as a period determined by the date of the last user payment (Fixed Period) like a membership subscription that is purchased for a set period of time.
This selection determines how the due dates are calculated, and so the next setting shown depends on this setting.
Fixed Dates: Renewal Dates
If the Payment Due Mode is “Fixed Dates” this setting is used to determine when those due dates are. This setting is a list of yearless dates, one date per line.
The default setting is
Jan 1
April 1
July 1
November 1
Which corresponds to a quarterly payment schedule beginning on January 1.
Fixed Period: Renewal Period
If the “Fixed Period” mode is used, this setting determines the period of time the membership payment is good for. Typical payment periods are available in a dropdown, more can be added using a code filter.
Multiple user-selectable payment periods, and payment for multiple periods (for instance if someone wanted to pay for more than one period) are not currently supported, but this is in the works.
Fixed Period: Late Payment Setting
When a payment is received before the due date, it is always credited to the due date, but if a payment is late, you can choose how the payment is applied in that case.
If “Payment goes to last due date” is selected, the late payment will always go to the last due date. For instance, if dues are collected every month, but a member is over a month late with their payment, they will be paying for the unpaid month, not the current month.
If “Payment goes to last payment date” is selected, the late payment counts from the date of the payment. For instance, as in the example above, if the member is over a month late, their payment will go to the current month, and the payment period will begin on the date of the payment.
Last Payment Date Field
This is the field used to store the date of the last payment. It must be a “Last Value Field” holding a date. This defaults to the “payment_date” field in the PayPal transaction data.
“Paid” Status Label
The text label used to show the payment status when the user is current with their payments.
“Payment Due” Status Label
The text label used to show the payment status when the member’s due date is passed, but is not overdue.
“Payable” Status
The “Payable” status label is used to show the payment status when the member’s payment can be made before the due date. In other words, when an account becomes “payable” the person is expected to make a payment during that period. This essentially sets up a payment reminder that is sent before the due date.
This setting has the number of days before the due date that the “payable” status begins, this is how many days before the due date that a reminder would be sent.
This setting is important to determining which due date a payment can be credited to: if a payment falls within the payable period for a due date, it is assumed the payment is for that due date.
“Past Due” Status
This label used to show the payment status when the member’s payment is overdue or past due. This sets up a second reminder that the person urgently needs to make a payment.
This setting also has the number of days after the due date that a payment becomes overdue. This is when an urgent reminder to pay can go out.
Initial Payment Status
When a record is newly created, and there is no payment history, this is the status that is assigned to the record.
A typical setting here would be “Payable” (the setting uses the “Payable” label), meaning the person is expected to pay after their record is added. This also works well if you are using a “Signup Payment” form, so even though the person is paying when registering, internally their status will go from “payable” to “paid” and trigger the appropriate note for making a payment.
If the setting is set to the “Paid” label, then the person is considered to have paid when the record is added, meaning that no reminders would be sent until the next payment status change happens.
If this setting is left blank, the payment status of the account is not tracked at all until a payment is made. This means that there will be no status change trigger when the account becomes payable or past due.
Advanced Settings Tab
The settings under this tab are available to administrators only.
Payment Log Edit Lock
If this is checked, the payment logs cannot be edited. This also prevents manual log entries from being made.
Use PayPal Sandbox
PayPal Sandbox provides a way to test your payments setup. It does require some technical knowledge and requires a developer account with PayPal. Setting up the account is free, and PayPal does a good job of explaining how to do sandboxing.
You must use a sandbox account payment button and token to make sandboxed test payments.
More info on PayPal sandboxing here: https://www.sandbox.paypal.com/
PayPal Sandbox Identity Token
This is the token to use while sandboxing, this is obtained from your sandbox account at PayPal.
PayPal Sandbox Button HTML
This is the button code to use while doing sandbox testing.
Testing Date
This is used for testing different scenarios for the member payment status. You can use this to simulate any date and what the member’s status will be on that date. This will also trigger any status change actions (such as an email if you have that configured in the Email Expansion add-on) so those can be tested as well.
This setting is only active if WP_DEBUG (or Participants Database debugging) has been enabled. Keep it blank if you have debugging enabled and want the member payment statuses to be calculated using the current date.
It is not recommended you run a live site with WP_DEBUG on, but if you must, you should leave this setting blank.
Also important: don’t enable WP_DEBUG_DISPLAY or the php setting “display_errors” These settings are for the purpose of displaying errors on the screen as they occur, but this can cause other problems because it can mean that WordPress is printing to the screen before it is completely initialized, which can cause more errors. It is best to use the php error log set up on the server to track your errors while debugging and don’t try to dump errors to the screen.
F.A.Q.
Is it possible to set the "return URL" in the shortcode?
Yes, both the Return URL and the Cancel Return Url can be set in the shortcode if you need a different payment flow for one of your forms.
What are the value tags or placeholders I can use in email templates?
The Member Payments plugin offers several value tags or placeholders that you can use in your email templates (when using the Email Expansion Kit) which include data returned from the payment processor and values that are generated as a result of the transaction. Here are some of the more useful ones:
- [payment_status] shows the current payment status for the member (such as “paid” or “past due”)
- [next_due_date] the date that the next payment will be due
PayPal return values
- [mc_gross] when using PayPal, this is the amount of the payment that was just made. You can also use the [txn_amount] tag for the same thing.
- [option_selection1] if you have a selector in your PayPal payment button, this is the value that was selected for that
Do you support other payment portals?
Not at this time, but it is in development. The Member Payments plugin currently supports only PayPal and offline payments.
What if a member wants to pay in person or with a check?
This is what “offline payments” are for. It gives you the ability to log a payment manually, and it will become part of the member’s record.
To add a payment log entry, open the member’s record for editing in the admin side. Find the “payment log” field, and you will see that it is possible to enter values for a new entry. Save the record to store the entry.
If you don’t see the fields you can type the new entry into, make sure the “Payment Log Edit Lock” setting is unchecked. Also, the backend user must have the necessary access level (usually editor or administrator).
Can I use a different PayPal button on another form?
Yes, there is the “button_html” shortcode attribute where you can place the HTML that will determine the PayPal button used. For instance:
[pdb_signup_member_payment button_html='<form action="https://www.sandbox.paypal.com/cgi-bin/webscr" method="post" target="_top">
<input type="hidden" name="cmd" value="_s-xclick">
<input type="hidden" name="hosted_button_id" value="JAFG98A">
<table>
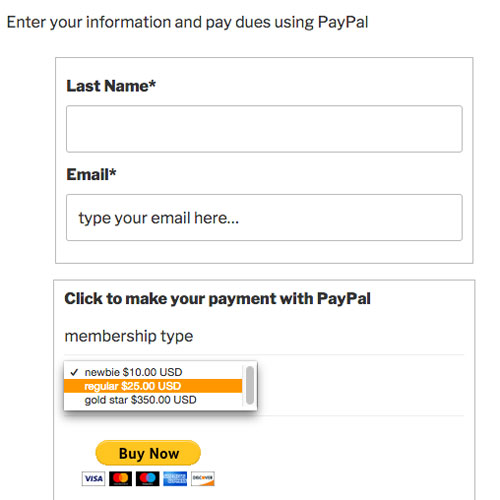
<tr><td><input type="hidden" name="on0" value="membership type">membership type</td></tr><tr><td><select name="os0">
<option value="newbie">newbie $10.00 USD</option>
<option value="regular">regular $25.00 USD</option>
<option value="gold star">gold star $350.00 USD</option>
</select> </td></tr>
</table>
<input type="hidden" name="currency_code" value="USD">
<input type="image" src="https://www.sandbox.paypal.com/en_US/i/btn/btn_buynowCC_LG.gif" border="0" name="submit" alt="PayPal - The safer, easier way to pay online!">
<img alt="" border="0" src="https://www.sandbox.paypal.com/en_US/i/scr/pixel.gif" width="1" height="1">
</form>' ]It’s important to use single quotes to enclose the HTML, and that the HTML uses double quotes only. If, for some reason, you need to include an apostrophe, you have to use the HTML entity equivalent: "
Note: this code is not a valid button, you must create your own button code in PayPal.
Can a record be automatically un-approved when the payment period ends and they have not made a payment for the next one?
Yes, it requires that you set up an action that is triggered when the account becomes due. This is a gist that demonstrates how to do that.
This action is set to fire when the account becomes due. If the user pays before the due date, the record will not be unapproved because the event won’t fire.
This assumes that you have set up the “Payment Status Settings” in the Member Payments addon.
Is it possible to use "Field Group Tabs" with the payment forms?
Yes, but I had to release an update to make it possible. Because both add-ons affect how the submit buttons works, I needed to create a special template to make it work.
These templates are named “bootstrap-tabs” and you can use them by setting up your shortcodes like this:
[pdb_signup_member_payment tabs=true template=”bootstrap-tabs”]
[pdb_record_member_payment tabs=true template=”bootstrap-tabs”]
Of course, these can be customized, you can use these templates (located in the add-on as /templates/pdb-single-member-payment-bootstrap-tabs.php and pdb-record-member-payment-bootstrap-tabs.php) as a starting point. Be sure to pay extra attention to the submit button setup, it’s a bit complex.
How do I set up automatic notifications for a payment that is due?
You must install the Email Expansion Kit add-on to provide the additional email capabilities needed to automatically notify your users when a payment becomes due.
The process for setting this up is the same for all the payment status events Member Payments generates.
First, of course, configure your Payment Status settings according to your needs. This sets up the conditions under which a user knows whether they are paid, past due, etc. When the user’s status changes, an event is generated. This event can be linked to one or more email templates so that an email will be sent at that time. The Member Payments plugin uses a “cron” to automatically check for these status changes and trigger the event: the user does not have to be logged in for this to happen.
Once you have the Payment Status configured, create a new Email Template and assign the event to the “Send Action” for the template. To let a user know their payment is past due (for example) select “Member Payments: Status change to: Payment Past Due”. Be sure to fill in the recipient name and email (use value tags for that) and then fill in the body and subject of the email that you want sent when that event occurs. You may want to include a link to the page where the payment can be made.
How do I test payment status notification emails?
Once you have your payment status notifications set up (these are email templates that are configured to send when a user’s payment status changes), you may want to see what happens when a payment status change event is triggered. The best way to do this is to use a test account and start with a test payment so you know what the starting condition is. This is helpful because the trigger is a status change, so you will want to know what the initial status is.
Important: to test this you must have WP_DEBUG set. Take a look at this page if you’re unsure how to set that up. This is something you will only want to do temporarily, don’t run your site with WP_DEBUG on unless you’re actively testing. You should also turn debugging on in Participants Database so you can see in the debug log what happened.
So, let’s say that your payment is set up to be good for a month, and then the user needs to pay again. The way to test this is to go to the Member Payments settings under the Advanced tab and set the “test date” to more than a month from the date the test account made their payment. Now go to the test account’s admin edit page and save the record. The plugin will check the status and if it is changed, trigger the event and thus the email. Check the debugging log to see the outgoing email.
Testing the Cron
If you want to test the effect of the cron, you should first install a cron management plugin such as Crontrol. The Member Payment plugin uses a cron named pdbmps_cron_updates to check for payment status changes. Set the test date as explained above, then trigger that cron event. You will see the effect of the status change in the debugging log.
Be sure that you know the initial status of the record you are testing. If the record’s status is already at the tested status, then a change won’t happen and the event won’t be triggered. You may need to look at the record’s data directly (using phpMyAdmin) to know for sure what the initial status was.
I have all the software up to date. But for whatever reason when I use the shortcode you have above:
[pdb_record_member_payment tabs=true template=”bootstrap-tabs”]
It says that the template isn’t there. I can see it in the templates folder. Why doesn’t the short code work?
Currently, the correct location for custom templates is
wp-content/participants-database-templates/Move your template file to this location and it should work, given that you have the name correct.
Using Participants Database Custom Templates
Hi, just bought this plugin and installed it, upon activating I get a fatal error, unfortunately the text is too long to paste here so I’ve uploaded it to Pastebin https://pastebin.com/fUWFPkv0
Any help would be greatly appreciated, thanks! :)
I’m sorry about that, php 8.1 is a bit particular about that. I will have a fix for this in the next release, but if you want to fix it now, here’s how to do that.
The file you want to edit is in the Participants Database plugin: PDb_Aux_Plugin.php
On line 301, you’ll see:
$this->plugin_options = get_option( $this->settings_name() );add this code in the line after that (before the close bracket!):
if ( ! is_array( $this->plugin_options ) ) {$this->plugin_options = array();
}
Then you can activate the Member Payments plugin.
The Membership Plugin for making a membership payment (shortcode [pdb_member_payment]) is looking for a shortcode plugin called “otw_shortcode_tinymce_plugin.js” and is giving us a “failed to load” error when we bring up the page in the page editor.
Is it required for us to install the tinymce plug-in in order to use pdb_member_payment shortcode? The page displays correctly when brought up on the website….however it doesnt “find” an email address that I know is in the database.
This is not related to Participant Database or Member Payments, we don’t require anything like that.
Hello Roland,
my customer asks for a second Participants Database on the same platform, which should be able to collect payments from the participants at a later point in time.
My first question (generally for Participants Database): You explain that I can simulate multiple databases via a hidden “type” field – Can I also assign these values (manually) to the records already “in”?
My second question: Is it possible to associate the Payment Module with the “type” field so that one “type” of partipants (other signup form and other output) don’t have to pay and the others have to pay?
Thank you for your help.
Best regards,
Antonie
Hi Antonie,
While this is in theory possible, I have not tried a setup like this, I have no idea what the problems are going to be, and so I can’t actually recommend you do it unless you’ve got the skills and the time to figure out how it needs to work. It is not something I can spend time working on, so I can be of little help. The Member Payments plugin is built with filters and actions that can be used to customize how it works, so the “infrastructure” is in place, you just need to know how to use it.
Your questions are right on target, however, and although it is not currently possible in the plugin to assign types to many records at once, you can do something like this with a database query if you know how to do that. The part that will be tricky is controlling the interactions with members who need to pay and members who don’t.
For most people, I would recommend you use a “paid membership” type plugin to manage this, since it will be built for this purpose and not something you have to write custom code for.
Thank you very much for your quick and open feedback. This is very helpful for me.
Best regards,
Antonie
Hi Roland,
Using Member Payments and Field Group Tabs… Im trying to find a way to make my Paypal payment the default radio button instead of the offline payment option (which is, in my case a “free” option). Any ideas?
Thanks so much!
If you look on the Manage Database Fields page, you’ll find a field usually titled “Payment Type” (name:”pdbmps_payment_type”) which configures the payment type radio buttons. You can set the default value there.
OH MY GAWD. I am so embarassed. Of course, I didn’t look there. THANK YOU SO MUCH!
Hi
I bought the payment plugin but when i install its giving fatal error
Hi can you please provide more information? Can you tell me the exact error it’s giving?
I’m happy to refund your purchase if the plugin is not working for you, but probably we can fix this, I just need more information about the problem.
Hi Roland,
When I query the mysql database like so
SELECT first_name,phone,email,timestamp,option_selection1,pdbmps_payment_type,entry_value FROM wp_participants_database CROSS JOIN wp_pdb_log_table_field WHERE entry_column=’mc_gross’ AND approved=’yes’
i get this result with that 1 payment ascribed to all users
Mikaela
96xxxx [email protected] 2021-05-09 20:02:27 cash 100
Constantine
960xxxx [email protected] 2021-05-09 20:02:27 cash 100
You’re not doing the JOIN correctly, you need to index (using “ON”) the joined table by the record ID so the payment entries are lined up with their respctive records.
Hi Roland It would be greatly appreciated if you could show me or direct a simple query example I’ve tried various many attempts but to no avail just to get the entry_value for mc_gross and the payment_date entry_value with the id and a name
if it’s not too much trouble can I cheekily ask I can imagine your very busy as it is
Many thanks In advance if possible :-(
nearly got it just need the entry_value payment_date
SELECT wp_pdb_log_table_field.id,first_name,phone,email,timestamp,option_selection1,pdbmps_payment_type,entry_value
FROM wp_participants_database
JOIN wp_pdb_log_table_field ON wp_participants_database.id = wp_pdb_log_table_field.record_id AND entry_column=’mc_gross’ GROUP BY mc_gross;
Be sure to include the table name in the field names after the SELECT. If it’s just the field name alone, it will assume it’s from the first table.
Hi Roland,
Is there a database field I can create to show the total payments paid so far, or a total paid tally to show in the admin area record of a participant’s record can we use the mc_gross values added all together in some way?
There isn’t anything set up in the plugin to do this, I’m sorry.
have you had a look here https://xnau.com/setting-up-payment-options-in-member-payments/
https://www.paypal.com/us/cgi-bin/webscr?cmd=p/acc/ipn-info-outside
https://www.paypal.com/cgi-bin/webscr?cmd=p/xcl/rec/pdt-intro-outside
Looking for some general advice on the best way to proceed with an integration using multiple membership levels with different pricing. I’m guessing I’m not the first to need to do this, so I’m hoping to not reinvent the wheel.
Scenarios is that there are 3 different membership types with different prices:
Newsletter Subscription: $30
Member: $40
Family Member: $50
What I’d like to be able to do is pass the price to PayPal Checkout based on the membership level. I was thinking that I’d use a bit of Javascript to populate a hidden field in PDB with the total, but I’m a bit unclear of how to pass that value to the PayPal checkout via your plugin.
A further complication is that there is a an option for a membership “upgrade” for Members and Family Members that adds an addition fee to the membership. Again, my strawman plan is to use javascript to add that fee the the membership fee in the hidden field at checkout of the “upgrade” is selected in the form.
This is my first time using your plug-in for a project, so any advice or guidance would be much appreciated. I’m a somewhat experience WordPress / PHP / Javascript developer, so what I’m looking for is mainly PDB specific info. Meanwhile I’m in teh process of reading through your code to understand how it works a little better.
Hi Eric,
The Member Payments plugin is not very sophisticated about this kind of thing, so while it will record payments of different amounts for different levels of membership, it’s not going to do anything automatic like knowing the person’s current level and offering a price for an upgrade. You’re correct in that you will need to use some custom javascript to make that happen.
In the payment button code is a value that is passed to PayPal as the amount to charge the account. You can change that amount in the form, and when it is submitted, that will show up as the charge.
Something that may be helpful to you is setting up options in the payment button that gives the person a way to select their level of membership. This value can then be passed to the record so you will be able to see which level of membership they selected and paid for. These options are set up in PayPal where you are defining your button. It is necssary to do it this way so that the option selection value is passed through the transaction and to the record.
I didn’t provide much instruction on setting this up, but once you have your payment options set up in your PayPal button, you can set up a field in the record to hold the value of which selection was used in the transaction. The option selection the user made is passed back to your site with the name “option_selection1” To capture that value in the PDB record, you need to create a field with that name. You can give it a different title once you’ve created it. If you set that field up as a dropdown or radio button, your option values should match that values you defined for the options in your PP button. When the person makes a payment, the value (the name of the option, not the price) they selected for their payment will be stored in the record in that field.
I strongly recommend you set up a sandbox account at PayPal and use it for testing.