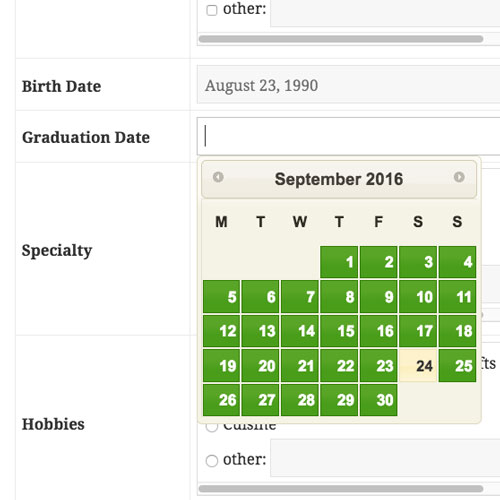
This plugin adds a configurable pop-up datepicker to all date fields.
Creating your own jQuery UI Theme
jQuery has built a UI Theme generator tool called ThemeRoller. It makes the complicated process of configuring a CSS stylesheet much easier. As you make changes, you can instantly see how it looks.
The easiest way to create a theme is to visit ThemeRoller and select a stock theme in the theme gallery (left column) that is close to the appearance you want. If you click on “edit” it will load the theme and you can begin to edit it. After you have made your changes, click on “Download Theme” (left column) and then just accept all the default options on the download page.
When you download, you’ll get a zip file. Open that up and look for a file named “jquery-ui.min.css” that is the only file you need to use. Also, there is a folder named “images” you’ll need that too. To put the files on your site where the plugin can use them requires that you have either FTP or you can do it using your hosting control panel file manager.
Using FTP or your File Manager, create a folder named “jq-ui-theme” in the wp-content/uploads/ folder on your site. Upload jquery-ui.min.css and the images folder you got from ThemeRoller into the new folder so you end up with wp-content/uploads/jq-ui-theme/jquery-ui.min.css.
Now, to use the new theme, set the “jQuery UI Theme Stylesheet” setting to: /uploads/jq-ui-theme/jquery-ui.min.css
If you want to make changes to your custom theme, you need to get a special link that will re-load your theme into ThemeRoller. On your computer, where you unzipped your downloaded theme, find the file named jquery-ui.css. At the top of that file is a very long link that will load your custom theme into ThemeRoller so you can make changes. After you make your changes and download them, just upload them back to your site, overwriting the theme files you had there before. The new theme will take effect when you reload your page.
Namespaced Themes
The Datepicker add-on now supports the use of namespaced themes. These are special themes that will only style the datepicker, leaving other jQuery UI elements to be styled with default or other theme stylesheets.
If you have issues with other elements on your site getting styled by the Datepicker theme, try using the “noconflict” theme.
If you want to create your own namespaced theme, head over to Theme Roller and build it with the namespace .pdb-datepicker.
Product Setup
The Datepicker is easy to set up, just install and activate. The default settings will place a pop-up datepicker on all your Participants Database date fields automatically, in all frontend and backend forms.
Probably the first setting you’ll want to adjust is the “Datepicker Theme” which determines the appearance of the datepicker. It does this by loading a theme file from an external source. The theme selector dropdown chooses a theme from the default set of themes available from jQuery. To see what these default themes look like, visit the jQuery UI Theme Gallery. On that page, you can also create your own theme, using one of the default themes as a starting point…but be warned, it’s a little complicated. I offer some guidance on how to set that up on the product support page. See the Settings tab for more detailed setup information.
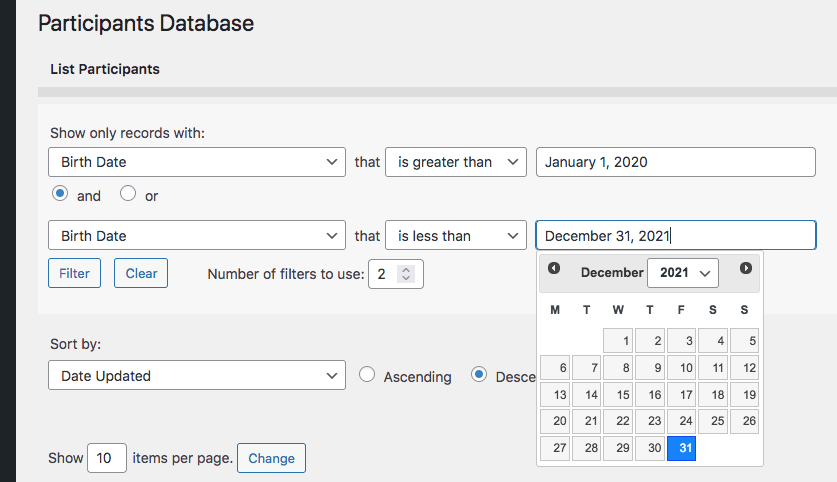
Datepicker now places datepickers on search inputs on the admin List Participants page. When a “date” type field is selected as the search field, a datepicker is placed on the input. To search for a range of dates, you must use two filters, for example:

Product Settings
Datepicker Theme
Selects the appearance of the datepicker from a set of default themes provided by jQuery.
Date Display Format
Normally, this uses the general date format of your site, but you can set it to something different here if you want.
Refer to this page for the full list of codes you can use here: php date format.
Earliest Date Limit, Last Date Limit
Sets the global date limit for all datepickers. This can be set on an individual basis in the field definition. Both “date limit” settings prevent the datepicker from selecting a date outside of the range specified by these settings. You can set one (minimum or maximum only), both (defines a range of acceptable dates) or niether (no limit to the date that can be selected). These settings can be overridden on individual date fields by using a configuration string in the “values” parameter (Manage Database Fields page). Something like: minDate::jan 1 2016, maxDate::dec 31 2017 would effectively prevent the selection of any date outside of the year 2016. NOTE: do not use commas in your dates, it will confuse the parser. It’s also possible to define the date limits as years only by using the ‘min’ and ‘max’ attributes, like this: minYear::1972,maxYear::2010
Advanced Settings
These settings will requires some technical knowledge to make use of. Be careful with these: you can break the plugin with an incorrect setting.
Datepicker Selector
This is the CSS selector used to place the datepicker. For instance, you can use this to target specific date fields if you didn’t want others to have the datepicker.
Additional Configuration Settings
This gives you advanced control over the datepicker on a global basis. This must be a properly-formatted Javascript object. See the jQuery Datepicker API for what you can do with this.
jQuery UI Theme Stylesheet
This is the URI of the UI theme stylesheet. This is set automatically by the theme selector above. If you want to use a different UI Theme, you can put the full URI to the stylesheet here. A path relative to the theme content root will work here too. If your WordPress theme has a jQuery UI theme configured, leave this space blank, so the WP theme can style the datepicker for you. Creating your own theme: I have an explanation of the process on the Datepicker product support page.
F.A.Q.
How do I set the range of dates available to the picker?
For each field, you can set the date range that is available to the picker on the field. To set this up, you need to add the “minDate” and “maxDate” attributes to the field. You do that by placing them in the “values” field of the field definition on the Manage Database Fields page.
For example, to limit the date range to dates, put this into the “values” field:
minDate::mar 10 2010, maxDate::sep 10 2015
Exactly like that. Be sure not to use commas in the dates, that will confuse things. You can, of course, change the dates to anything you need them to be.
To set the picker to a range of years, you can use the “minYear” and “maxYear” attributes, like this:
minYear::1970,maxYear::2016
Can I make it easier to select a date that is many years ago?
Yes, there is a setting that will add a “year selector” to the picker. This makes it easy for the user to select a year and not have to step through the months.
In the Datepicker settings there is a setting called “Additional Configuration Settings” where you can add configurations to the datepicker.
To provide a year selector, put this in that setting:
{
"changeYear" : true
}
It must be exactly like that. Now, users will be able to easily select the year.
Does the datepicker work in the backend?
Yes, the datepicker is active in both the “Add Participant” and “Edit Participant” pages in the admin.
How can I prevent the user typing in a date that bypasses the date limits set in the datepicker configuration?
It is possible to add a little bit of javascript to the date input that prevents the user typing in to the field, forcing them to use the datepicker. You can do this in the date field “attributes” configuration by adding “onkeypress::event.preventDefault()” to the attributes. For example:


Hi!
Im having another issue with the datepicker: when I select a date, it saves the day before the one I’ve selected. So if I choose the April 5th, it saves the April 4th…
Take a look at this article that explains this issue and how to solve it: Date Shifting and Other Timezone-related Issues in Participants Database
Hello, I have an Issue recording date field. I installed the date picker, all the date settings (wordpress core, PDB and Date picker’s) are set d/m/y. The problem is that since I installed the date picker, the plugin isn’t recording any date, after click on “Apply” the system gives me blank fields on date fields. I have disabled my cache plugin. What can be the problema? Thank you in advance.
Best Regards
PS: My name is Joel Pizzano, I couldn’t send this message logged in because I had an error message (like my message were spam)
Yes, I’ve been replying to your messages in the WP forum.
So far, I haven’t been able to figure out what’s going on for you there. I’ve tried testing pretty much the exact setup you’re using (as much as I can with what I know) and not seeing any problems here, so we need more information to move forward with this.
The next step is to take a look at your php error log. You should clear the log then test saving a date.
Another thing that can be a factor is make sure your php installation includes the “intl” module. Ask your hosting provider about this if you don’t have control over which php modulues are included.
My other suggestion is you try using a different date format, using month names is much more reliable, for instance. But since your settings are working fine for me here, this isn’t really a solution, just avoiding the problem.
I figured out how you need to do this. You need to add a handler to the datepicker configuration, but you’re going to need to update the Datepicker plugin to the latest version first.
You do this in the “Additional Configuration Settings” setting for the Datepicker plugin. If you look at the Datepicker API, you’ll see it’s possible to add a handler function to some datepicker events.
Here is an example setting that does this:
{changeYear:true,
onSelect: function(date) {
alert(date);
}
}
The “changeYear” item is not needed, it just shows that you can add multiple configurations to the object.
Thank you for taking a look.
I have tried your suggestion but whatever I add in the “Additional Configuration Settings”, when I try to save, its tells me it is a security risk and I can’t proceed!
If I proceed anyway it says:
Uncaught ReferenceError: pdbdp is not defined pdb-datepicker.min.js:2:426
And now for some reason my previous jquery code that could ‘see’ a change in date if the date was typed manually, or if the existing date in the form was more than 3 years ago , no longer works!!
For the moment, I am completely stumped.
Make sure the syntax of Additional Configuration Settings is correct, if there is a syntax error there, it will stop everything from working. It must be a valid javascript object.